Interface de línea de comandos
Introducción
The command-line interface allows advanced users to increase their productivity and perform complex operations that cannot be performed using any of the other elements of the SEXTANTE GUI. Models involving several algorithms can be defined using the command-line interface, and additional operations such as loops and conditional sentences can be added to create more flexible and powerful workflows.
La interfaz
Introducción
Invoking the command-line interface will make the following dialog appear.
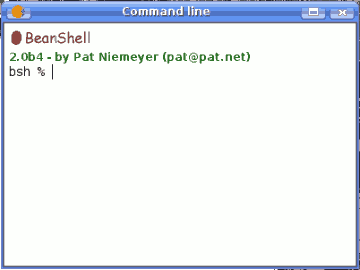
SEXTANTE command-line
The SEXTANTE command-line interface is based on BeanShell. BeanShell is a Java source interpreter with object scripting language features, that meaning that it dynamically executes standard Java syntax and extends it with common scripting conveniences such as loose types, commands, and method closures like those in Perl and JavaScript.
A detailed description of BeanShell and its usage can be found at the BeanShell website. Refer to it if you want to learn more about generic BeanShell features. This chapter covers only those particular elements which are related to SEXTANTE geoalgorithms.
By using the extension mechanisms of BeanShell, SEXTANTE adds several new commands to it, so you can run geoalgorithms or get information about the geospatial data you are using, among other things.
Java users can create small scripts and programs combining standard elements of Java with SEXTANTE commands. However, those who are not familiar with Java can also use the command-line interface to execute single processes or small sets of them, simply calling the corresponding methods.
A detailed description of all SEXTANTE commands is given next.
Obtener información sobre los datos
Algorithms need data to run. Layers and tables are identified using the name they have in the table of contents of the GIS (and which usually can be modied using GIS tool). To call a geoalgorithm you have to pass it an identifier which represents the data to use for an input.
The data() command prints a list of all data objects available to be used, along with the particular name of each one (i.e. the one you have to use to refer to it). Calling it you will get something like this:
RASTER LAYERS
-----------------
mdt25.asc

VECTOR LAYERS
-----------------
Curvas de nivel

TABLES
-----------------
Be aware that gvSIG allows you to have several layers with the same name. SEXTANTE will just take the first one which matches the specified identifier, so you should make sure you rename your data object so each one of them has a unique name.
To get more information about a particular data object, use the describe(name of data object) command. Here are a few examples of the result you will get when using it to get more information about a vector layer, a raster layer and a table.
>describe points
Type: Vector layer - Point
Number of entities: 300
Table fields: | ID | X | Y | SAND | SILT | CLAY | SOILTYPE | EXTRAPOLAT |

>describe dem25
Type: Raster layer
X min: 262846.525725
X max: 277871.525725
Y min: 4454025.0
Y max: 4464275.0
Cellsize X: 25.0
Cellsize Y: 0.0
Rows: 410
Cols: 601

>describe spatialCorrelation
Type: TableNumber of records: 156
Table fields: | Distance | I_Moran | c_Geary | Semivariance |
Obtener información sobre los algoritmos de análisis geográfico
Once you know which data you have, it is time to know which algorithms are available and how to use them.
When you execute an algorithm using the toolbox, you use a parameters window with several fields, each one of them corresponding to a single parameter. When you use the command line interface, you must know which parameters are needed, so as to pass the right values to use to the method that runs that algorithm. Of course you do not have to memorize the requirements of all the algorithms, since SEXTANTE has a method to describe an algorithm in detail. But before we see that method, let's have a look at another one, the algs() method. It has no parameters, and it just prints a list of all the available algorithms. Here is a little part of that list as you will see it in your command-line shell.
bsh % algs();
acccost-------------------------------: Accumulated cost(isotropic)
acccostanisotropic--------------------: Accumulated cost (anisotropic)
acccostcombined-----------------------: Accumulated cost (combined)
accflow-------------------------------: Flow accumulation
acv-----------------------------------: Anisotropic coefficient of variation
addeventtheme-------------------------: Points layer from table
aggregate-----------------------------: Aggregate
aggregationindex----------------------: Aggregation index
ahp-----------------------------------: Analytical Hierarchy Process (AHP)
aspect--------------------------------: Aspect
buffer--------------------------------: Buffer
On the right you find the name of the algorithm in the current language, which is the same name that identifies the algorithm in the toolbox. However, this name is not constant, since it depends on the current language, and thus cannot be used to call the algorithm. Instead, a command-line is needed. On the left side of the list you will find the command-line name of each algorithm. This is the one you have to use to make a reference to the algorithm you want to use.
Now, let's see how to get a list of the parameters that an algorithms require and the outputs that it will generate. To do it, you can use the describealg(name of the algorithm) method. Use the command-line name of the algorithm, not the full descriptive name.
For example, if we want to calculate a ow accumulation layer from a DEM, we will need to execute the corresponding module, which, according to the list show using the ags() method,is identified as accflow. The following is a description of its inputs and outputs.
>describealg("accflow")
Usage: accflow(DEM[Raster Layer]
              WEIGHTS[Optional Raster Layer]
              METHOD[Selection]
              CONVERGENCE[Numerical Value]
              FLOWACC [output raster layer])
Ejecutando algoritmos
Now you know how to describe data and algorithms, so you have everything you need to run any algorithm. There is only one single command to execute algorithms: runalg. Its syntax is as follows:
> runalgname_of_the_algorithm, param1, param2, ..., paramN)
The list of parameters to add depends on the algorithm you want to run, and is exactly the list that the describealg method gives you, in the same order as shown.
Depending on the type of parameter, values are introduced differently. The next one is aquick review of how to introduce values for each type of input parameter
- [Raster Layer], [Vector Layer]o [Table]. Simply introduce the name that identies the data object to use. If the input is optional and you do not want to use any data object, write #".
- [Numerical value]. Directly type the value to use or the name of a variable containing that value.
- [Selection]. Type the number that identies the desired option, as shown by the options command
- [String]. Directly type the string to use or the name of a variable containing it.
- [Boolean]. Type whether true" or false" (including quotes)
- [Multiple selection - tipo datos]. Type the list of objects to use, separated by commas and enclosed between quotes.
For example, for the maxvaluegrid algorithm:
Usage: runalg("maxvaluegrid",
      INPUT[Multiple Input - Raster Layer]
      NODATA[Boolean],
      RESULT[Output raster layer])
The next line shows a valid usage example:
> runalg("maxvaluegrid", "lyr1, lyr2, lyr3", "false", "#")
Of course, lyr1, lyr2 and lyr3 must be valid layers already loaded into gvSIG.
When the multiple input is comprised of raster bands, each element is represented by a pair of values (layer, band). For example, for the cluster algorithm:
Usage: runalg ("cluster",
      INPUT[Multiple Input - Band]
      NUMCLASS[Numerical Value]) ***************
The next line shows a valid usage example:
> runalg("cluster, "lyr1, 1, lyr1, 2, lyr2, 2", 5, "#", "#")
The algorithm will use three bands, two of them from lyr1 (the first and the second ones of that layer) and one from lyr2 (its second band).
- [Table Field from XXX ]. Write the name of the field to use. This parameter is case sensitive.
- [Fixed Table ]. Type the list of all table values separated by commas and enclosed between quotes. Values start on the upper row and go from left to right. Here is an example:
runalg("kernelfilter", mdt25.asc, "-1, -1, -1, -1, 9, -1, -1, -1, -1", "#")
- [Point ]. Write the pair of coordinates separated by commas and enclosed between quotes. For instance "220345, 4453616"
Input parameters such as strings or numerical values have default values. To use them, type "#" in the corresponding parameter entry instead of a value expression.
For output data objects, type the filepath to be used to save it, just as it is done from the toolbox. If you want to save the result to a temporary file, type "#".
Ajustar las características de la capa raster de salida
Just like when you execute a geoalgorithm from the toolbox, when it generates new raster layers you have to define the extent and cellsize of those layers.
By default, those characteristics are defined based on the input layers. You can toggle this behaviour using the autoextent command.
> autoextent("true"/"false)
If you want to define the output raster characteristics manually or using a supporting layer, you have to use the extent command, which has three different variants.
Usage: extent(raster layer[string])
       extent(vector layer[string], cellsize[double])
       extent(x min[double], y min[double],
              x max[double], y max[double],
              cell size[double])
Type "autoextent" to use automatic extent fitting when possible
When this command is used, the autoextent functionality is automatically deactivated.
